
No-Knead Bread Recipe
The Ultimate No-Knead Bread: A Foolproof Guide to Artisan Loaves at Home
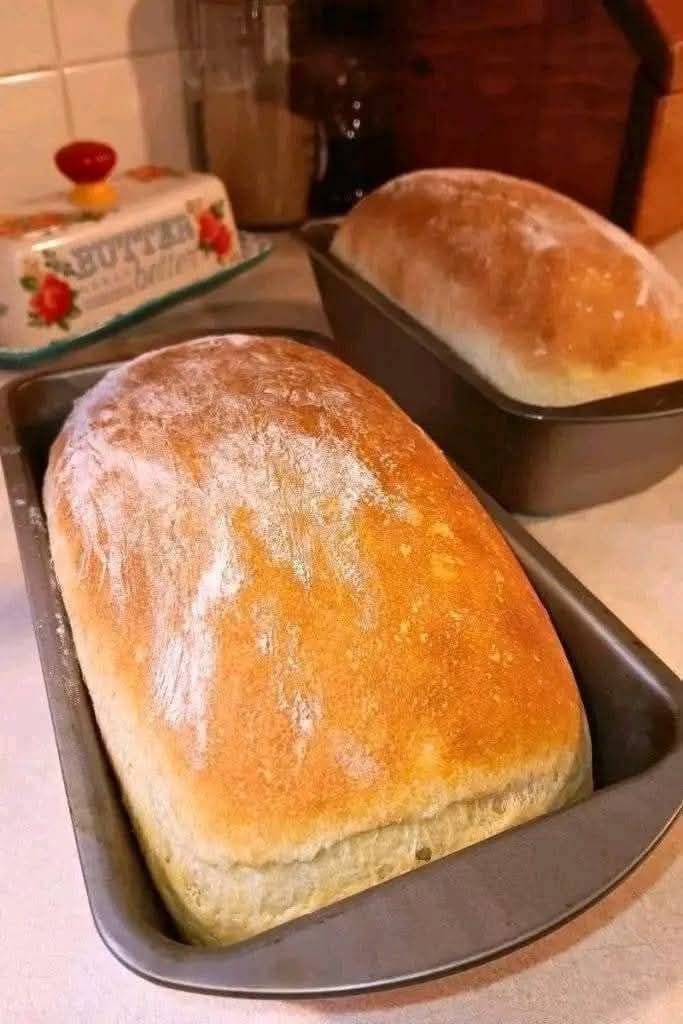
Imagine the intoxicating aroma of freshly baked bread filling your home—a golden, crackly crust giving way to a soft, airy crumb. This isn’t a dream from a fancy bakery; it’s something you can create in your own kitchen with just four simple ingredients. This revolutionary no-knead bread recipe swaps strenuous effort for the simple magic of time, allowing you to bake a stunning artisan-style loaf that’s rich in flavor and texture. Perfect for beginners and seasoned bakers alike, this method, pioneered by Jim Lahey, proves that incredible bread is accessible to everyone.
The Magic of Four Simple Ingredients
This recipe’s beauty lies in its simplicity. Here’s what you’ll need and why each component is essential.
- 3 cups (360 g) All-Purpose Flour: The backbone of your loaf. All-purpose flour yields a wonderfully soft crumb, while bread flour can be substituted for an even chewier texture.
- 1 ½ cups (360 ml) Warm Water: The key to activating yeast and hydrating the flour. Aim for a temperature around 110°F (43°C)—comfortably warm to the touch.
- 1 teaspoon (4 g) Active Dry Yeast: A small amount goes a long way. The long, slow fermentation process allows this tiny bit of yeast to work its magic, developing deep, complex flavors.
- 1 teaspoon (6 g) Salt: More than just for taste, salt is crucial for strengthening the gluten structure and controlling the yeast’s activity, ensuring a well-risen, flavorful loaf.
Essential Baking Equipment
You don’t need a professional kitchen, just a few key tools to guarantee success.
- Large Mixing Bowl: To give your dough ample space to double in size.
- Wooden Spoon or Spatula: For gently mixing the shaggy dough without overworking it.
- Plastic Wrap or a Kitchen Towel: To cover the bowl and create a humid environment for the dough to rise.
- Dutch Oven with a Lid: This is the secret weapon for achieving a bakery-quality crust. It traps steam, creating the perfect environment for a dramatic rise and a crisp exterior.
- Sturdy Oven Mitts: Safety first! Your Dutch oven will be extremely hot.
- Wire Cooling Rack: Essential for allowing air to circulate around the finished loaf, keeping the bottom crust from getting soggy.
Step-by-Step Guide to Your Perfect Loaf
Combine the Dry Ingredients
In your large mixing bowl, whisk together the flour, yeast, and salt. Distributing them evenly now prevents the salt from directly inhibiting the yeast, ensuring a consistent rise.
Add Water and Mix
Pour the warm water into the flour mixture. Use a spatula or wooden spoon to stir until just combined. You’re looking for a shaggy, sticky, and messy-looking dough. Don’t be tempted to knead it—the magic happens during the resting period.
The Long, Flavor-Building Rise
Cover the bowl tightly and let it sit at room temperature (around 70-75°F or 21-24°C) for 12 to 18 hours. During this slow fermentation, the gluten develops naturally, and the dough will become bubbly, double in size, and acquire a rich, complex flavor.
Shape the Loaf
Generously flour a clean work surface. Gently scrape the risen, wobbly dough out of the bowl. With floured hands, carefully fold the dough over on itself two or three times to form a rough ball. Be gentle to preserve the precious air bubbles you’ve created.
Preheat for a Perfect Crust
Place your empty Dutch oven (with the lid on) into your oven and preheat to 450°F (232°C). Let the Dutch oven heat for a full 30 minutes. This intense, immediate heat is critical for “oven spring”—the final burst of rising that gives the loaf its impressive height and airy texture.
Bake to Perfection
Carefully remove the scorching hot Dutch oven from the oven. Gently place your dough inside, cover with the lid, and return to the oven. Bake for 30 minutes. The trapped steam will create a beautifully crisp and glossy crust. Then, remove the lid and bake for another 15 minutes, or until the crust is a deep golden brown.
Cool Before Slicing
Using your oven mitts, transfer the bread to a wire cooling rack. As tempting as it is, wait at least 45 minutes to an hour before slicing. The bread is still cooking internally as it cools, and cutting it too soon will result in a gummy texture. Patience here is rewarded with the perfect slice!
Serving Suggestions and Storage Tips
How to Enjoy Your Artisan Bread
- Serve warm with a smear of quality butter or a drizzle of olive oil.
- Use it as the base for a rustic avocado toast or hearty sandwich.
- Dip it into your favorite soups, stews, or saucy pasta dishes.
- Toast it and top with jam, cheese, or honey for a delightful breakfast.
Storing Your Loaf
- At Room Temperature: For the best crust, store the bread cut-side down on a cutting board or wrap it in a paper bag for up to 3 days.
- In the Freezer: To preserve its freshness long-term, slice the loaf completely and store it in an airtight freezer bag for up to 3 months. Reheat slices directly from the freezer in a toaster or oven.