
Low-Point Milk Bread
The Ultimate Low-Point Milk Bread: A Light & Fluffy WW-Friendly Recipe
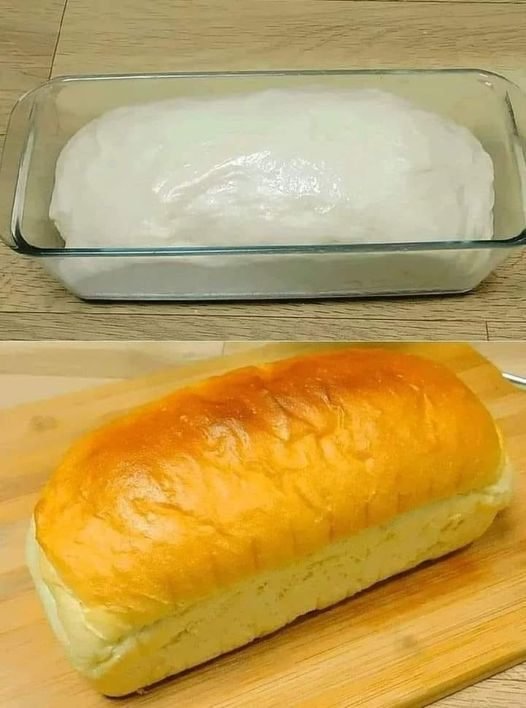
Welcome to our kitchen! Today, we’re thrilled to share a healthier, Weight Watchers (WW) friendly twist on a beloved classic: Milk Bread. Famous for its incredibly soft, cloud-like texture and delicate sweetness, this bread is a perfect canvas for sandwiches or a delightful treat on its own. We’ve carefully crafted this recipe to be low in points without sacrificing the taste and fluffiness you adore. Get ready to bake a guilt-free loaf that will become your new favorite!
Recipe at a Glance
- WW SmartPoints® per slice: 2 points
- Yields: 1 loaf (12 slices)
- Prep Time: 20 minutes
- Rise Time: 1 hour
- Cook Time: 35 minutes
What You’ll Need
For the Dough:
- 2 cups all-purpose flour (use whole wheat or a blend for more fiber)
- 1 cup skim milk
- 1/4 cup honey (or a zero-calorie sweetener like Stevia for fewer points)
- 1/4 cup unsweetened applesauce (a brilliant fat substitute!)
- 1 large egg
- 2 teaspoons instant yeast
- 1/2 teaspoon salt
For the Topping (Optional):
- 1 tablespoon unsweetened almond milk, for brushing
- 1 teaspoon sesame seeds or poppy seeds, for texture
Step-by-Step Baking Guide
- Activate the Yeast: Gently warm the skim milk in a small bowl to about 110°F (43°C) — it should feel warm, not hot. Stir in the instant yeast and let it sit for about 5 minutes until it becomes foamy. This proves your yeast is active and ready to work its magic.
- Mix the Wet Ingredients: In a large mixing bowl, whisk together the honey (or sweetener), unsweetened applesauce, and the large egg until smooth. Pour in the activated yeast and milk mixture and whisk again to combine everything thoroughly.
- Form the Dough: Gradually add the flour and salt to the wet ingredients, stirring with a spatula until a shaggy dough begins to form. Don’t worry if it’s a bit sticky; that’s the secret to a moist loaf!
- Knead to Perfection: Turn the dough out onto a lightly floured surface. Knead for 8-10 minutes until it transforms into a smooth, elastic ball. If it remains too sticky to handle, add a touch more flour, one tablespoon at a time.
- First Rise: Place the dough into a lightly oiled bowl, cover it with a kitchen towel or plastic wrap, and let it rise in a warm, draft-free spot for about 1 hour, or until it has doubled in size. This fermentation step is key to developing that signature fluffy texture.
- Shape the Loaf: Gently punch down the risen dough to release the air. Transfer it to your floured surface and shape it into a neat loaf that will fit into a greased 9×5-inch loaf pan.
- Prepare for Baking: Preheat your oven to 350°F (175°C). For a beautiful golden-brown crust, lightly brush the top of the loaf with almond milk and sprinkle with sesame or poppy seeds, if using.
- Bake Until Golden: Bake for 30-35 minutes. The bread is done when the top is a deep golden brown and it sounds hollow when you tap the bottom. An instant-read thermometer should register 190°F (88°C).
- Cool and Slice: Let the bread cool in the pan for 10 minutes before carefully transferring it to a wire rack. Allow it to cool completely before slicing. This is crucial for the bread to set properly and avoid a gummy texture. Once cool, slice into 12 even pieces and enjoy!

Nutrition & Weight Watchers Points
Per Serving (1 slice):
- Calories: 90
- Total Fat: 1g
- Saturated Fat: 0g
- Carbohydrates: 17g
- Fiber: 1g
- Sugars: 7g
- Protein: 4g
Weight Watchers SmartPoints® (per slice): 2 points
Please note: Point values are estimates and can vary based on the specific brands of ingredients you use. For the most accurate count, we recommend calculating the points using your WW app.
Tips, Tricks, and Variations
Customization Ideas
This recipe is a fantastic base for your creativity! Try mixing in savory herbs like rosemary, sweet spices like cinnamon and nutmeg, or a handful of dried fruit for a different flavor profile.
Achieving the Perfect Texture
The texture of your crust is all up to you. For a supremely soft crust, loosely cover the loaf with aluminum foil during the last 10 minutes of baking. If you prefer a heartier, crustier exterior, simply let it bake uncovered until it’s a rich, deep brown.
Serving Suggestions
This low-point milk bread is incredibly versatile. Enjoy a slice toasted with a light fruit spread for breakfast, use it as the foundation for a healthy turkey and avocado sandwich, or serve it alongside a warm bowl of soup.
Storage & Meal Prep
Store leftover bread in an airtight container at room temperature for up to 3 days. To enjoy fresh-tasting bread anytime, pre-slice the loaf and freeze it in a resealable freezer bag. You can toast slices directly from the freezer for a quick and convenient option.