
Introduction
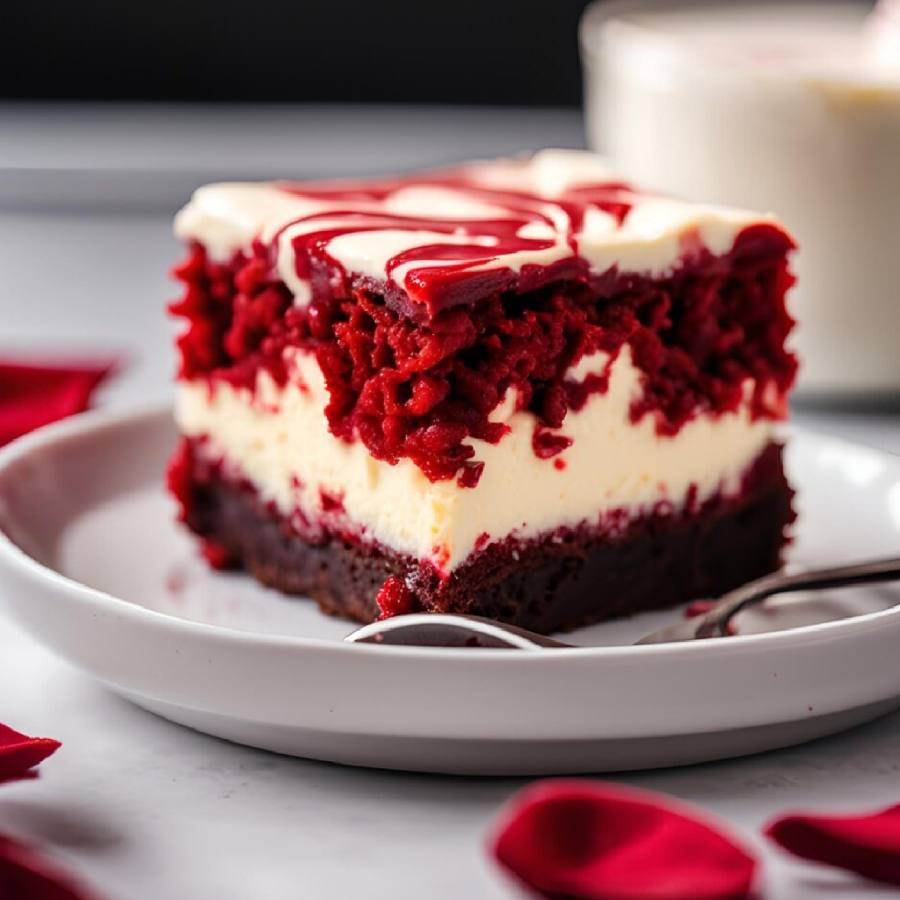
Red velvet brownies are a unique and decadent twist on the classic red velvet cake. These brownies have a rich, velvety texture, and a beautiful crimson color that makes them visually stunning. The combination of cocoa powder and buttermilk creates a slightly tangy flavor, which balances out the sweetness, while the cream cheese swirl or frosting adds an extra indulgent touch. Perfect for special occasions or whenever you’re craving a dessert that’s a bit more indulgent, these red velvet brownies offer the perfect balance of rich flavor and luxurious texture.
The History of Red Velvet:
Red velvet cake has an intriguing history, dating back to the 1920s. The exact origin is debated, but it’s believed to have emerged in the American South. The cake became popular due to its striking red color and the soft texture from the use of buttermilk and cocoa powder. The addition of cream cheese frosting further enhanced its appeal. Over the years, red velvet’s popularity spread to various desserts, from cupcakes to brownies, and even milkshakes. These red velvet brownies are an evolution of the beloved red velvet cake, offering a more convenient and bite-sized dessert with the same iconic flavors.
Ingredients Breakdown:
For the Brownies:
- All-purpose flour: The base of the brownie, providing structure and texture.
- Cocoa powder: Adds a deep chocolate flavor that enhances the overall taste.
- Granulated sugar: Sweetens the brownies and helps them achieve the desired texture.
- Butter: Adds richness and flavor, contributing to the moist texture.
- Eggs: Bind the ingredients together and provide structure.
- Buttermilk: A signature ingredient in red velvet recipes, buttermilk contributes to the tangy flavor and tender texture.
- Red food coloring: Gives the brownies their signature vibrant red hue.
- Vanilla extract: Adds depth of flavor to the batter.
For the Cream Cheese Swirl (optional):
- Cream cheese: Provides a rich, tangy contrast to the sweetness of the brownies.
- Powdered sugar: Sweetens the cream cheese swirl and helps it blend smoothly.
- Vanilla extract: Adds flavor to the swirl.
- Egg: Helps bind the cream cheese mixture and creates a smooth consistency.
Step-by-Step Recipe:
Ingredients:
For the Brownies:
- 1 ½ cups all-purpose flour
- ¼ cup cocoa powder
- 1 ¼ cups granulated sugar
- ½ cup unsalted butter, melted
- 2 large eggs
- ½ cup buttermilk
- 1 tablespoon red food coloring
- 1 teaspoon vanilla extract
- ½ teaspoon baking powder
- ½ teaspoon salt
For the Cream Cheese Swirl (optional):
- 8 oz cream cheese, softened
- ½ cup powdered sugar
- 1 teaspoon vanilla extract
- 1 egg
Instructions:
- Preheat the Oven:
- Preheat your oven to 350°F (175°C). Grease and line a 9×9-inch baking pan with parchment paper, leaving a slight overhang for easy removal of the brownies after baking.
- Prepare the Brownie Batter:
- In a medium bowl, whisk together the flour, cocoa powder, baking powder, and salt.
- In a separate large bowl, whisk the sugar and melted butter until combined. Add the eggs, one at a time, mixing after each addition.
- Stir in the buttermilk, vanilla extract, and red food coloring until the batter is smooth and well-blended.
- Gradually fold in the dry ingredients until just combined. Do not overmix.
- Make the Cream Cheese Swirl (optional):
- In a separate bowl, beat the softened cream cheese until smooth and creamy. Add the powdered sugar, vanilla extract, and egg, and beat until well combined and smooth.
- Assemble the Brownies:
- Pour the brownie batter into the prepared baking pan and spread it into an even layer.
- Dollop spoonfuls of the cream cheese mixture on top of the brownie batter. Use a knife or skewer to swirl the cream cheese into the brownie batter for a marbled effect.
- Bake:
- Bake in the preheated oven for 30–35 minutes, or until a toothpick inserted into the center comes out with just a few moist crumbs. Avoid overbaking to keep the brownies soft and fudgy.
- Cool and Serve:
- Allow the brownies to cool in the pan on a wire rack for at least 20 minutes before cutting into squares. For a firmer texture, you can refrigerate the brownies for 30 minutes before slicing.
Tips for the Perfect Red Velvet Brownies:
- Don’t Overmix the Batter:
- Overmixing the brownie batter can result in a dense and dry texture. Stir until just combined for a fudgy, moist result.
- Use Quality Red Food Coloring:
- Use a high-quality gel or liquid food coloring to achieve the signature bright red color. Gel food coloring tends to provide a more vibrant hue without changing the texture of the brownies.
- Customize the Swirl:
- If you prefer a more subtle cream cheese flavor, you can skip the cream cheese swirl or adjust the sweetness and tang to suit your taste.
- Check for Doneness:
- Be careful not to overbake the brownies. Insert a toothpick into the center, and if it comes out with a few moist crumbs, they’re ready. You want them to be fudgy, not dry.
Variations and Customizations:
- Frosting:
- Instead of the cream cheese swirl, top the brownies with traditional cream cheese frosting after they cool for a more cake-like treat.
- Add-ins:
- For a bit of crunch and flavor contrast, try adding chopped white chocolate chips, pecans, or walnuts to the brownie batter.
- Make Them Gluten-Free:
- Substitute the all-purpose flour with a gluten-free flour blend to make these brownies gluten-free. Be sure to also check that your baking powder is gluten-free.
- Lighter Version:
- For a lighter version, you can use a reduced-fat cream cheese or yogurt in place of the cream cheese for the swirl, or even skip the swirl and add a light dusting of powdered sugar instead.
Health Considerations and Nutritional Value:
These red velvet brownies are a rich, indulgent dessert and are best enjoyed in moderation. They are high in calories, sugar, and fat due to the combination of butter, sugar, and cream cheese. However, you can make slight modifications, such as using reduced-fat cream cheese or replacing some of the sugar with a sugar substitute, to reduce the calorie count.
Nutritional Information (per serving, based on 16 brownies):
- Calories: ~250-300
- Carbohydrates: ~32g
- Protein: ~3g
- Fat: ~14g
- Fiber: ~1g
- Sugar: ~25g
For a healthier version, try reducing the sugar content or adding a small amount of fruit, like mashed bananas or applesauce, to the batter.
FAQ:
1. Can I make Red Velvet Brownies ahead of time?
- Yes! You can prepare these brownies a day or two ahead of time. Store them in an airtight container at room temperature or refrigerate them for longer freshness.
2. Can I freeze these brownies?
- Absolutely! After the brownies have completely cooled, wrap them tightly in plastic wrap and foil, and freeze for up to 2 months. Thaw at room temperature before serving.
3. Can I use a different color than red?
- Yes! While the traditional red velvet brownies are made with red food coloring, you can use other colors (like blue or pink) for a fun twist or to match a theme.
4. Can I skip the cream cheese swirl?
- Yes! If you prefer a simpler brownie, you can skip the cream cheese swirl altogether. You can even add chocolate chips for extra richness.
Red Velvet Brownies Recipe
Ingredients
Method
- Preheat the Oven:
- Preheat your oven to 350°F (175°C). Line an 8×8-inch baking pan with parchment paper, leaving some overhang on the sides to make it easy to lift the brownies out after baking.
- Prepare the Red Velvet Brownie Batter:
- In a large mixing bowl, whisk together the melted butter and sugar until smooth and well combined.
- Add the eggs, vanilla extract, and red food coloring. Stir until the mixture is fully incorporated.
- Sift the cocoa powder, flour, and salt into the wet ingredients. Gently fold the dry ingredients into the wet ingredients until just combined. Be careful not to overmix, as this can affect the texture.
- Make the Cheesecake Layer:
- In a separate bowl, beat the softened cream cheese and sugar together until smooth and creamy.
- Add the egg and vanilla extract, and continue to beat until the mixture is free of lumps and fully combined.
- Assemble the Brownies:
- Pour about 3/4 of the red velvet brownie batter into the prepared baking pan, spreading it evenly into the bottom.
- Carefully pour the cheesecake layer over the brownie layer, spreading it gently to the edges of the pan.
- Drop spoonfuls of the remaining red velvet batter over the cheesecake layer. Use a knife or toothpick to swirl the red velvet batter into the cheesecake to create a marbled effect.
- Bake:
- Bake in the preheated oven for 30-35 minutes, or until the center is set and a toothpick inserted into the center comes out mostly clean (a few moist crumbs are okay). The cheesecake layer should be slightly golden around the edges.
- Cool:
- Let the brownies cool completely in the pan on a wire rack before removing them. For cleaner cuts, chill the brownies in the refrigerator for at least 30 minutes to help the layers set.
- Serve:
- Once the brownies are cooled, slice them into squares. Serve them as is, or top with a dollop of whipped cream or a drizzle of chocolate sauce for an extra indulgent treat.
Notes
- Storage: Store the brownies in an airtight container in the refrigerator for up to 5 days. These also freeze well for up to 3 months.
- Red Velvet Tip: If you prefer not to use food coloring, you can reduce the amount or omit it, though it won’t have the signature red velvet color.
- Add-ins: For an extra twist, stir in white chocolate chips or dark chocolate chunks into the red velvet batter before baking.